Wednesday, December 8, 2010

Wizard staff!!!

Wizards need staffs. So do bishops.  Gothi. Also big hats. Bishops... big hats...wizards...big hats...not so sure about gothi...but I'd guess, big hats.....however. Staffs. or Staves...so here is a wizard/bishop/gothi staff/stave...beautiful ash staff/stave...absolutely not a hoe/rake handle...hand-hewn from the heart of yggdrasil...the tree of woe...the dry tree...the one tree...the world tree...Katy is skeptical, but I just needed to make a wizard staff...sorry, but, as dumbass as it is, I just needed it...to be increasingly obscure, if any Gucci Popes/bishops are around...I'd do a trade.
Anyhoo...a wizard staff/bishops staff/ gothistick..there it is...I figure, it won't sell, so I can just walk around town with it, with a big hat.

Progress on knife

It's been a while, but here are some images.This is one half of the hilt. I've used an hydraulic press to make the basic form, and transfered the image to the silver...now I will trace the lines to the silver with a liner, which will make a groove on the face, and a slight mark on the reverse.
 This is the hilt after the first pass withe the liner, and a little with the grooves on the hilt.
  
First pass on the repoussed side. Following the lines of the liner/tracer, I've pushed up (repoussed) the volumes of the forms
Roughly pushed up, I  will refine the traced/ liner lines, and push up again
So, a little more refined...
And, here is the piece pretty much finished up...the halves have been soldered together.
The other side...so now I'll need to do the end caps, and fittings around the throat!


Tuesday, October 19, 2010

Progress on scabbard plates


so here are some images from the progress on the knife scabbard/hilt...they show the repousse/chasing in process...the initial form of the scabbard halves was developed with simple dies, and the hydraulic press...the design was then transferred to the face of the shaped blanks, and the lines to delineate the designs lightly chased in, over pitch. The piece was then turned over, sunk in pitch again, and repoussed, from the back, to punch up the design. This took about three rounds of repousse, to get it to a good height. then the design was chased down from the face side, modelling and detailing the surface.
 The third image is of the repousse tools...you can see that they are a range of sizes, and also radius...tho they all have that basic shape of a circle with about a third ground away...gives you straight edges, curves, and some corners...also note that they are rough...the largest very rough...this keeps them from bouncing around, and also is better for stretching the metal...imagine a polished tool hammered into metal...the metal slips on the polished surface, and in the resulting dent, the center of the dent the metal is thinner...but with a rough tool, the metal can't slip away so the metal thickness stays more consistent...and actually, though it seems like a good idea to have highly polished tools for the chasing, or front, a little tooth really helps there too, though not so rough...maybe a 320 grit finish...polishing will easily remove those marks, but even that slight tooth really helps keep the tool accurate and controlled. Pat

Thursday, September 30, 2010

So, here are the finished spurs, also, a shot of the Sutton Hoo buckles and panels in sterling.
The secret to successful inlay is the tools...the chisels...they must be perfectly ground, precisely hardened and tempered, then perfectly sharpened...if you get that right, then the carving of the inlay channels, tho very time consuming, is pretty straightforward. As you go, you will find yourself refining the grind, the shape, and the hardening/tempering. You can see, as the tool cuts, where it is binding, what areas of the cutter need to be relieved and reshape accordingly. And when the cutting face chips, you know it is a little too hard, or when it deforms, it is too soft...and you can reharden, and temper, to a better result...
  To harden, heat to red hot, and quench in the appropriate medium, oil for O series steels, water for W. Then polish the entire tool, apply the torch. gently to the middle of the shank. and watch the colors run out towards the tip...don't heat any part red hot at this point, just enough to get those bands of color moving away from the heated area...when the first flush of yellow gets to the tip, QUENCH...faint yellow, don't wait for the full straw yellow. Then sharpen...if the tip is too hard, chips in use, just keep resharpening...as you grind it back , you will hit an area that is just the right hardness...if it bends, deforms, then reharden and temper again.
  The groove needs to be the same width as the wire you will inlay...and the depth should be approx 2/3 the width...It is tempting to go too deep, thinking that the deeper one goes, the better it will hold...not so. It is the under cut that holds the inlay in place,. not the depth. And a good under cut is dependant upon the angle you can get with the undercutting chisel...obviously, the deeper you go, it becomes problematic to actually get an undercut.
 Be sure to drive the under cutting chisel in far enough to push the metal up a bit...this really helps...and watch the opposite side of the groove from your cut...if you are not careful, the chisel shaft will marr that side.
 When setting the wire in place...get one end set, lightly tap in the rest. cut the end off with a small sharp chisel then work the whole length is gradually...if you just start at one end and move along, the wire will stretch, and you will have less material to fill up the under cuts.


 File down to a flat surface, sand, polish, clean, and place in a 500/600 degree oven with a light even coating of oil..I used WD-40...the steel will blue/blacken. the fine silver will stay pretty bright, the copper will darken, but a light polish with a rouge cloth will get that off...then finish with wax.
 Loved doing the work...a very satisfying technique that I will definitely pursue further

Friday, September 17, 2010

Spurs in progress

So, knife done, horns done...now for a pair of spurs.
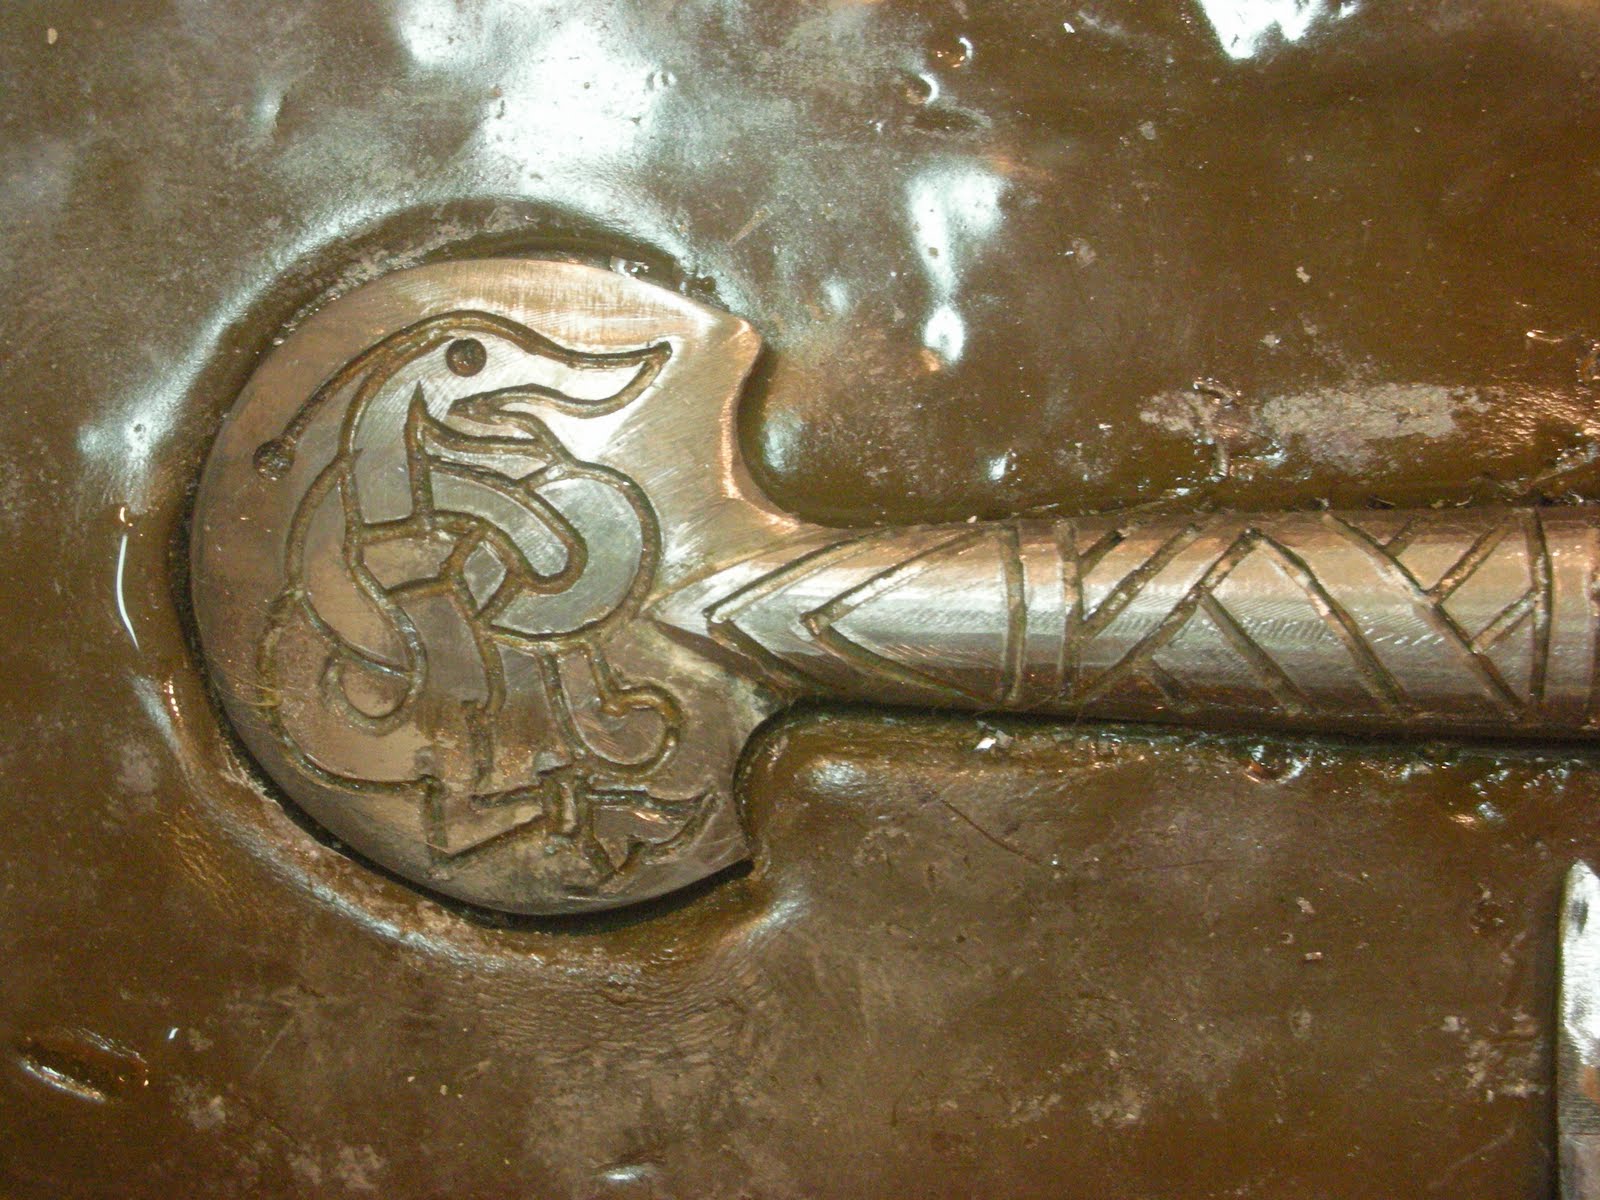
 Norse, with damascene inlay of fine silver and, maybe, some copper. Based on some typical forms of the period, I've used as motifs two styles, somewhat anachronistic, but appropriate. The Borre-style ring chain, and the Jellinge-style ( I believe) dragonish creature from a famous silver bowl.
 I've done this type of inlay a few times before...basically the procedure is to cut a groove in the steel, 2/3 deep as wide, under cut the edges, draw or roll some fine silver wire to the width of the groove, and a little taller (so, rectangular), and hammer it into the groove, where it fills the undercut and is locked in place. Then you file/sand it flush, and blacken the steel for contrast.
 The really critical thing is the chisels. They need to be perfectly ground, tuned, sharpened, hardened, and tempered for this technique to work, Luckily I enjoy making tiny chisels, so I have had alot of fun getting these just right. They are based on Japanese pattern chisels, used for the same technique, and there is an excellent description of the process, and detailed diagrams in Oppi Untracht's Jewelry concepts and technology.
 With the steel set in pitch, the chisels, hardened tool steel, cut thru the mild steel like butter...you just have to get the angles of the cutting edges right, so that they cut without binding. I've got one V-section chisel, for initial cutting, and two flat bottom types, one for straight lines, one for curves...the grinds are subtly different, Also two chisels for the undercutting, one wide and flat for straight areas, and one small and slightly curved for concave curves.
 The basic form of the spurs was forged , ground, and filed from some 1/2 round stock, then set in pitch, the design drawn on with a Sharpie, and chiseled out, using a light chasing hammer. Once the undercuts are made, the wire can be hammered in with a slightly roughened steel punch.
  I'll do most of the cutting while the bands are still flat, then bend to shape, finish the cutting( I'm worried that in the bent area, the grooves might distort in bending, so I'll wait till after, the set in the wire.


The two spurs set in pitch, with some chisels

 It's a time consuming process, but enjoyable, as it is so very direct. Pat

Wednesday, August 11, 2010

So, here are the completed horns...a last shot of the terminals, which I like...and a shot for scale...a very satisfying project, for which I am very thankful to Wolfgang...


Also some images of another just completed project...a dagger in the anglo-saxon style...the blade is from the much missed Mishka...pattern welded, and of his usual amazing quality...rest in peace, dude.

the hilt is of the typicasl composite construction of the period, cast silver plates sandwiching wooden cores for the guards...filigree silver plate overlay...also "clips" on the grip, fabricated sheet, with sweated filigree spirals and beads...the scabbard elements cast, with the filigree decoration applied...and then the garnet inlay...A technique I have always wished to attempt, was quite intimidated...I chose to pierce the grid, although it appears that in period these were fabricated...I just felt more facile with the saw...fine silver, 2mm thick...the pommel fabricated from sheet, embellished with wire and shot...an associate of mine, John Cushing, had a good stash of garnet rough on hand, and I'm very grateful for his polishing of the exterior faces...once I had got the garnet from John, I super glued the stones, polish down on a brass platen and used a diamond lap wheel to reduce the stones to the correct thickness...tacking them to a reasonable polish

each stone was then epoxy glued to a nail head...don't use superglue, not so super, and the stones ground using diamond wheels to fit in the cells...Transfering the cel perimeter to the stone was a little problematic...what worked well was to paint the stone with Chinese white, and trace around the interior of the cell with a finely sharpened hard pencil...this was before the pierced cell grid was soldered to the baseplate...but, actually, it was not so hard to cut the stones to fit from the front, once the grid had been soldered down to the faceplate...keep the speed slow, cut dry, use the different radius cutters to your advantage...also, cut thru the nailhead as well as the stone...especially with the smaller bits, the shear pressure on the stone tends to make it break off...but if you cut thru the nailhead as well, this lessens the shear pressure.
 Once fit, each stone was glued in place with epoxy...not too period, I know, but convenient...when I do this again, I certainly will grind all the stones to be slightly thicker than the piercework panel...then use the wet sander, and polishers to finish the stones in place...as it was, some were too thin, which required alot of grinding
the center quatrefoil in each face was a little too big for the stones available, so they are composites of two stones, cut with a straight mating edge
I'm quite happy with the results...I think I pushed all my technical abilities ti the immediate edge with this one...and the design pleases me as well...for me it has the correct feel, something from a market in Kabul, maybe, it just feels old, and good in the hand...Pat

Tuesday, July 20, 2010

Horns done!

Finished! ...at last...almost. All bands fitted, glued and rivetted in place...straps done... the plates on the straps are cast panels based on the sutton hoo find...I've cleaned out the horns, but they still need a lining...beeswax option number one: authentic, organic, pleasant...drawbacks, not so durable...foodsafe resin option number two...durable, scrubable, low maitenance, but it is plastic resin.

 It is a good idea to line them, there should be no leaks, except perhaps around the rim, which the lining will seal, but the cow horn is a good breeding ground for bacteria...my preference, I think is for the beeswax...can't be used for hot liquids, true, but these are unlikely to be coffee cups...also, it's nice to leave enough wax to fill up the bottom 4-5 inches of the horn...the toughest area to clean, and, also, a problem when drinking...there is this air bubble thing that happens when drinking from a horn this large (and helical) where when you tip back, an air bubble forms in the tip, and then as you drink, breaks, sending a sudden surge of beverage over your face...careful and experienced manipulation of the horn ( sort of a twisting motion as you tip back) can minimize this tendency, but it's not foolproof...fool and the draining of beer from a Texas longhorn being a short step!

Saturday, July 10, 2010

Well, pretty much on the last stretch here...I've assembled and fixed in place the tip components...the three etched and formed bands, joined by rivets, and the cast terminal, now set with carnelians...the two bands as well, up in the middle of the horns...all is glued and either rivetted or nailed in place. Still have to fix in place the rim itself...the pieces are done, but I'm waiting on a delivery for a particular type of wire...the "van dykes" for the rim are all done, repoussed and chased...there's this one, and also an Odin with braided beard...pretty close to finish...tho still need to make the straps! I've already cast several panels for them, need a few more.

Friday, June 25, 2010

This is the first rough fitting of the bands...underestimated the amount of bronze i would need...so waiting a couple of days for another sheet to arrive...enough to do the second rim, and the missing bits at the tip...then I'll tweak the fit a bit, and apply trim strips to cover the joints and thicken up the edges.

Wednesday, June 23, 2010

These are some of the etched plates for the Viking drinking horns...still four more to go...then it's assembly time.

Saturday, March 20, 2010

Horns in process

Here are a few images of my latest commision.
The horn tip is based on a piece from Norway, said to be a croizer, probably Irish. To make the master, I repoussed and chased mirror images, soldered together, then pulled a rubber mold, and cast in bronze.
The conical tip was made by dipping the horn tip in wax, then carving the motifs. Still have to make the rubber mold...next I'll be etching the bands. Pat

Thursday, January 7, 2010

Please visit our other blog moonboxstudio.blogspot.com.

Followers

Contributors