Monday, March 21, 2011

Seax pictures


Just a few more pictures of the finished seax.

Sunday, March 6, 2011

So, done at last.l..not much to say except yee-haaa, ...very happy with the result...exactly what I wanted, an odd amalgamation of tibetan/nepalese knife and a 9th c. norse scramseax.

Saturday, March 5, 2011

Almost done...


So, all assembly done. All that is left to do is patina the silver, fit and glue in the wooden cores, and affix the two end caps. After all this time and work, I must admit I am pretty excited...can't rush at this point and make some stupid mistake!

Tuesday, February 15, 2011

Silver repoussed seax.

So, back, at last to this one...all the repousse is done, and it is final assembly time...and the garnet inlay...the garnets have been ground down to their final thickness, about 1.6 mm...alittle nervous about this, but we will see...the last dagger, the garnets were thicker.


  I've done an Odin mask for the scabbard tip...

Wednesday, December 8, 2010

Wizard staff!!!

Wizards need staffs. So do bishops.  Gothi. Also big hats. Bishops... big hats...wizards...big hats...not so sure about gothi...but I'd guess, big hats.....however. Staffs. or Staves...so here is a wizard/bishop/gothi staff/stave...beautiful ash staff/stave...absolutely not a hoe/rake handle...hand-hewn from the heart of yggdrasil...the tree of woe...the dry tree...the one tree...the world tree...Katy is skeptical, but I just needed to make a wizard staff...sorry, but, as dumbass as it is, I just needed it...to be increasingly obscure, if any Gucci Popes/bishops are around...I'd do a trade.
Anyhoo...a wizard staff/bishops staff/ gothistick..there it is...I figure, it won't sell, so I can just walk around town with it, with a big hat.

Progress on knife

It's been a while, but here are some images.This is one half of the hilt. I've used an hydraulic press to make the basic form, and transfered the image to the silver...now I will trace the lines to the silver with a liner, which will make a groove on the face, and a slight mark on the reverse.
 This is the hilt after the first pass withe the liner, and a little with the grooves on the hilt.
  
First pass on the repoussed side. Following the lines of the liner/tracer, I've pushed up (repoussed) the volumes of the forms
Roughly pushed up, I  will refine the traced/ liner lines, and push up again
So, a little more refined...
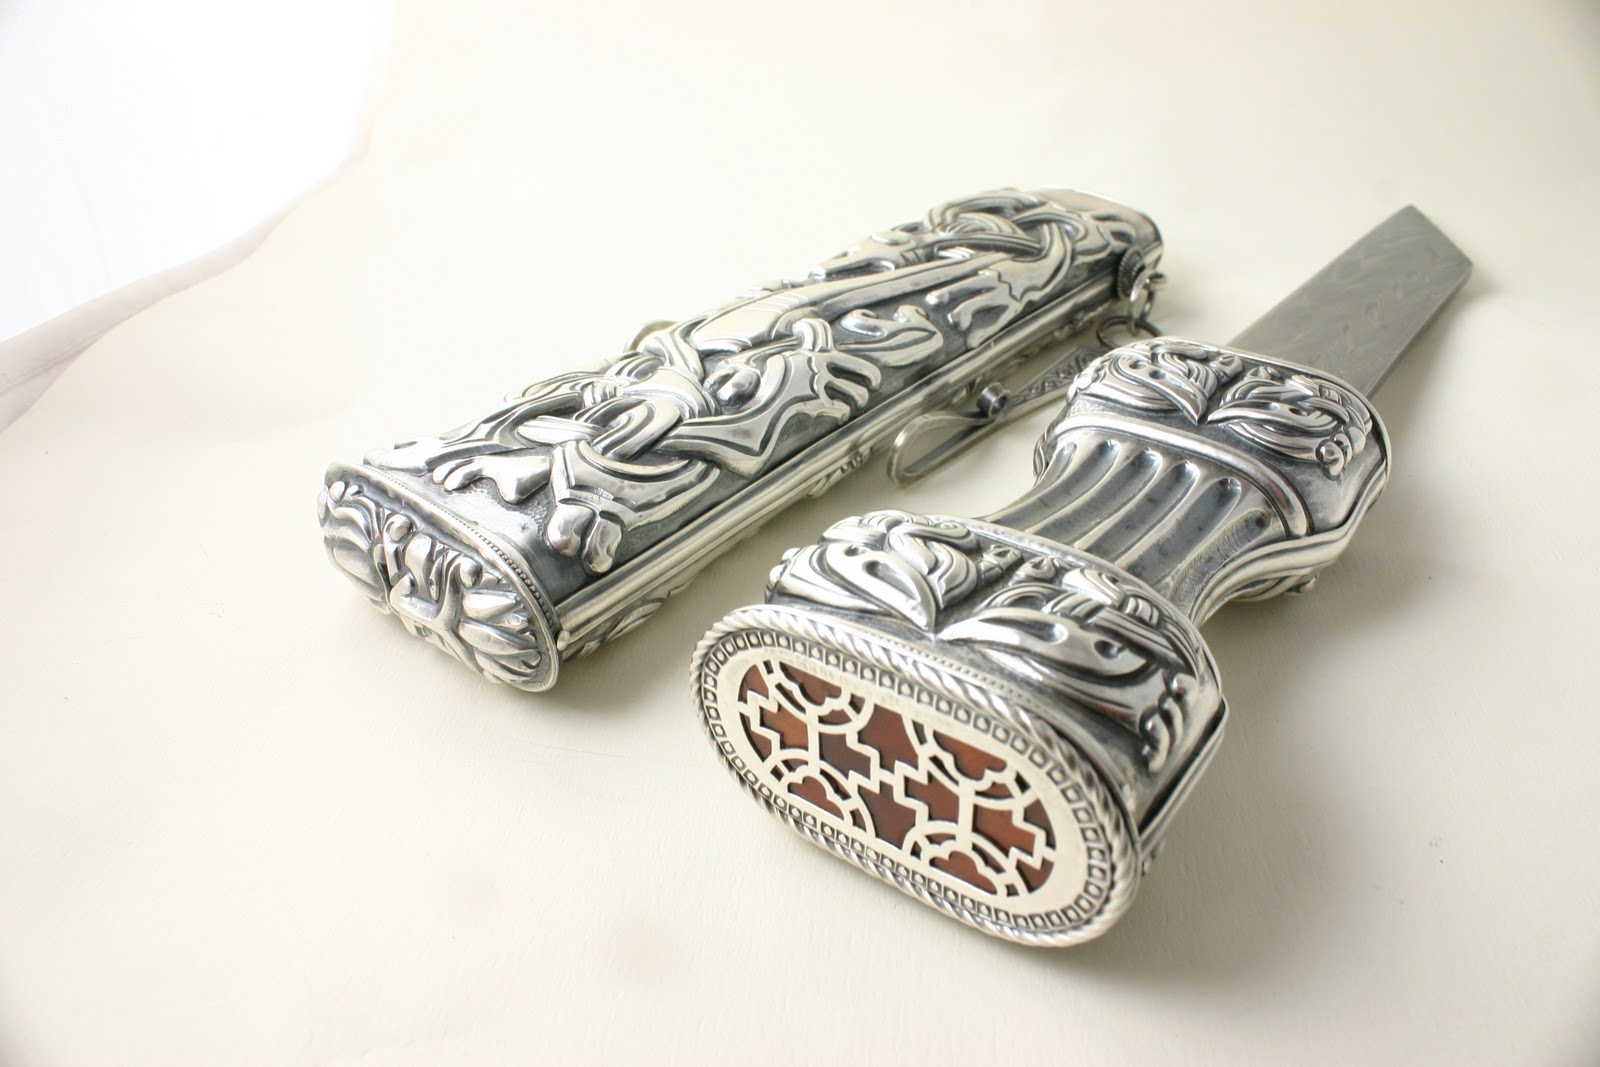
And, here is the piece pretty much finished up...the halves have been soldered together.
The other side...so now I'll need to do the end caps, and fittings around the throat!


Tuesday, October 19, 2010

Progress on scabbard plates


so here are some images from the progress on the knife scabbard/hilt...they show the repousse/chasing in process...the initial form of the scabbard halves was developed with simple dies, and the hydraulic press...the design was then transferred to the face of the shaped blanks, and the lines to delineate the designs lightly chased in, over pitch. The piece was then turned over, sunk in pitch again, and repoussed, from the back, to punch up the design. This took about three rounds of repousse, to get it to a good height. then the design was chased down from the face side, modelling and detailing the surface.
 The third image is of the repousse tools...you can see that they are a range of sizes, and also radius...tho they all have that basic shape of a circle with about a third ground away...gives you straight edges, curves, and some corners...also note that they are rough...the largest very rough...this keeps them from bouncing around, and also is better for stretching the metal...imagine a polished tool hammered into metal...the metal slips on the polished surface, and in the resulting dent, the center of the dent the metal is thinner...but with a rough tool, the metal can't slip away so the metal thickness stays more consistent...and actually, though it seems like a good idea to have highly polished tools for the chasing, or front, a little tooth really helps there too, though not so rough...maybe a 320 grit finish...polishing will easily remove those marks, but even that slight tooth really helps keep the tool accurate and controlled. Pat

Followers

Contributors