Thursday, September 30, 2010

So, here are the finished spurs, also, a shot of the Sutton Hoo buckles and panels in sterling.
The secret to successful inlay is the tools...the chisels...they must be perfectly ground, precisely hardened and tempered, then perfectly sharpened...if you get that right, then the carving of the inlay channels, tho very time consuming, is pretty straightforward. As you go, you will find yourself refining the grind, the shape, and the hardening/tempering. You can see, as the tool cuts, where it is binding, what areas of the cutter need to be relieved and reshape accordingly. And when the cutting face chips, you know it is a little too hard, or when it deforms, it is too soft...and you can reharden, and temper, to a better result...
  To harden, heat to red hot, and quench in the appropriate medium, oil for O series steels, water for W. Then polish the entire tool, apply the torch. gently to the middle of the shank. and watch the colors run out towards the tip...don't heat any part red hot at this point, just enough to get those bands of color moving away from the heated area...when the first flush of yellow gets to the tip, QUENCH...faint yellow, don't wait for the full straw yellow. Then sharpen...if the tip is too hard, chips in use, just keep resharpening...as you grind it back , you will hit an area that is just the right hardness...if it bends, deforms, then reharden and temper again.
  The groove needs to be the same width as the wire you will inlay...and the depth should be approx 2/3 the width...It is tempting to go too deep, thinking that the deeper one goes, the better it will hold...not so. It is the under cut that holds the inlay in place,. not the depth. And a good under cut is dependant upon the angle you can get with the undercutting chisel...obviously, the deeper you go, it becomes problematic to actually get an undercut.
 Be sure to drive the under cutting chisel in far enough to push the metal up a bit...this really helps...and watch the opposite side of the groove from your cut...if you are not careful, the chisel shaft will marr that side.
 When setting the wire in place...get one end set, lightly tap in the rest. cut the end off with a small sharp chisel then work the whole length is gradually...if you just start at one end and move along, the wire will stretch, and you will have less material to fill up the under cuts.


 File down to a flat surface, sand, polish, clean, and place in a 500/600 degree oven with a light even coating of oil..I used WD-40...the steel will blue/blacken. the fine silver will stay pretty bright, the copper will darken, but a light polish with a rouge cloth will get that off...then finish with wax.
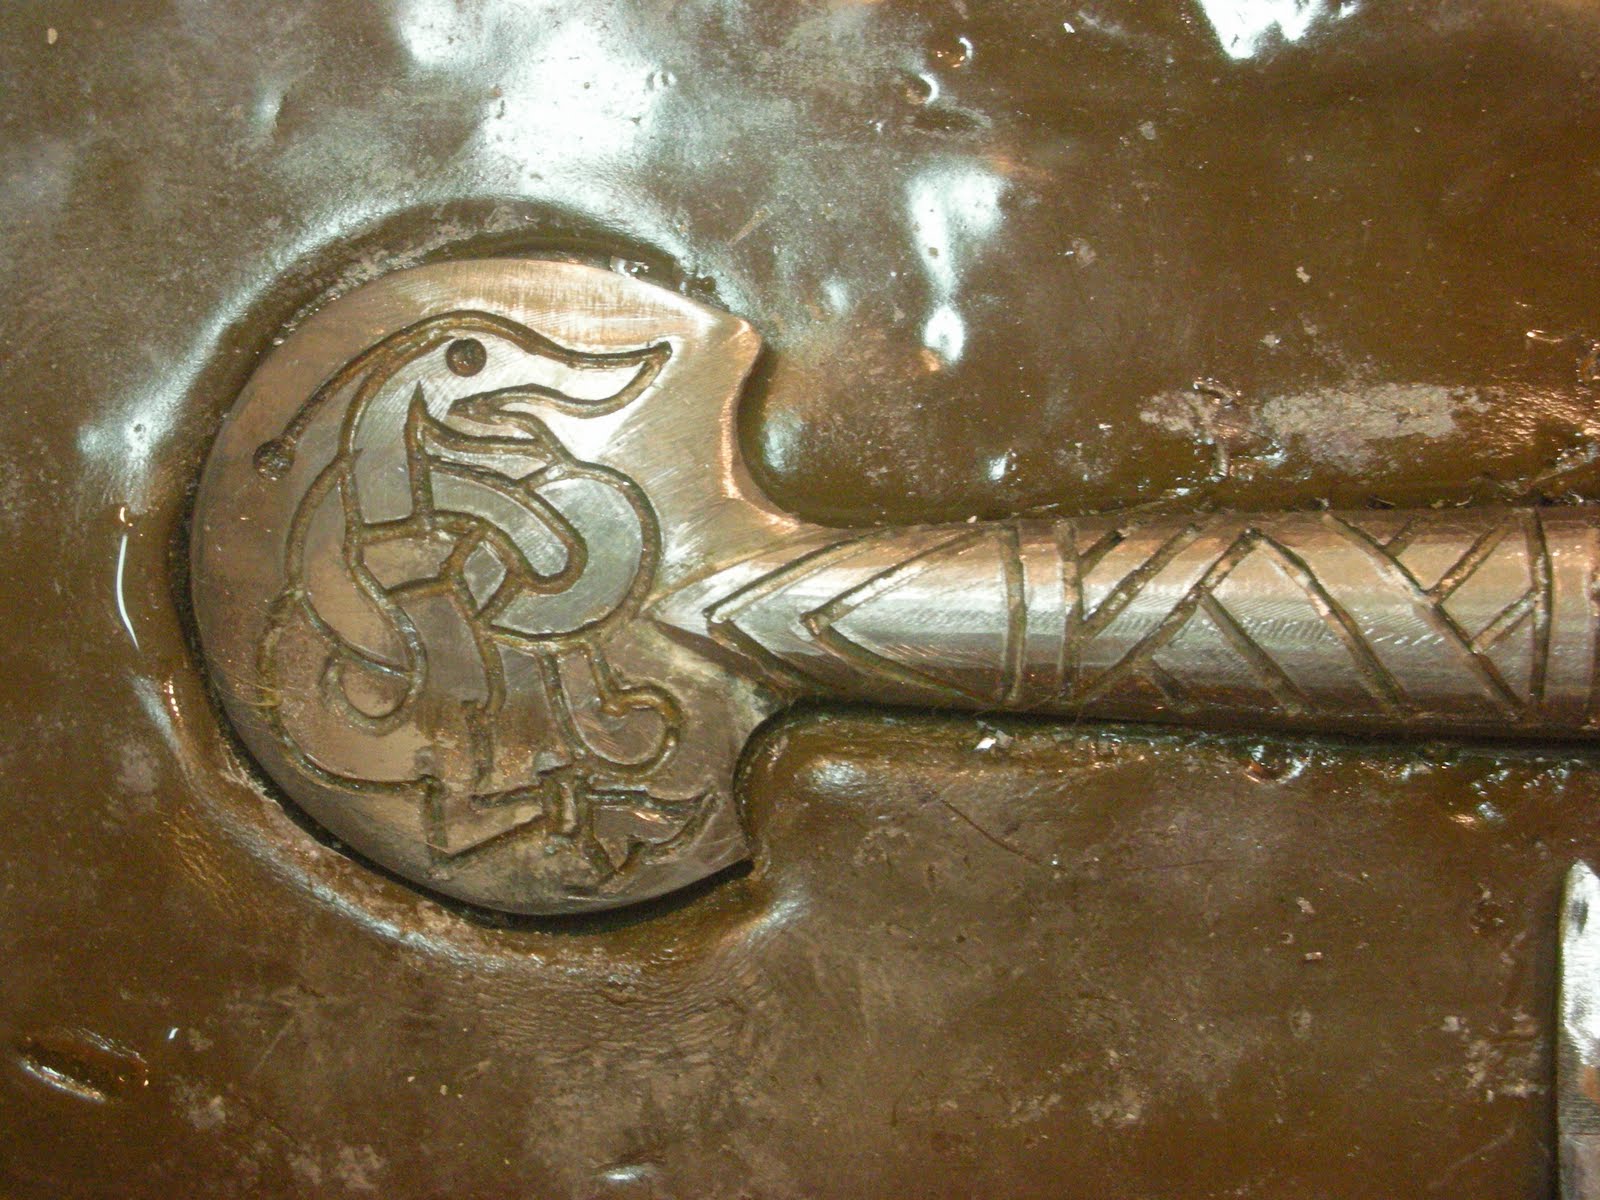
 Loved doing the work...a very satisfying technique that I will definitely pursue further

Friday, September 17, 2010

Spurs in progress

So, knife done, horns done...now for a pair of spurs.
 Norse, with damascene inlay of fine silver and, maybe, some copper. Based on some typical forms of the period, I've used as motifs two styles, somewhat anachronistic, but appropriate. The Borre-style ring chain, and the Jellinge-style ( I believe) dragonish creature from a famous silver bowl.
 I've done this type of inlay a few times before...basically the procedure is to cut a groove in the steel, 2/3 deep as wide, under cut the edges, draw or roll some fine silver wire to the width of the groove, and a little taller (so, rectangular), and hammer it into the groove, where it fills the undercut and is locked in place. Then you file/sand it flush, and blacken the steel for contrast.
 The really critical thing is the chisels. They need to be perfectly ground, tuned, sharpened, hardened, and tempered for this technique to work, Luckily I enjoy making tiny chisels, so I have had alot of fun getting these just right. They are based on Japanese pattern chisels, used for the same technique, and there is an excellent description of the process, and detailed diagrams in Oppi Untracht's Jewelry concepts and technology.
 With the steel set in pitch, the chisels, hardened tool steel, cut thru the mild steel like butter...you just have to get the angles of the cutting edges right, so that they cut without binding. I've got one V-section chisel, for initial cutting, and two flat bottom types, one for straight lines, one for curves...the grinds are subtly different, Also two chisels for the undercutting, one wide and flat for straight areas, and one small and slightly curved for concave curves.
 The basic form of the spurs was forged , ground, and filed from some 1/2 round stock, then set in pitch, the design drawn on with a Sharpie, and chiseled out, using a light chasing hammer. Once the undercuts are made, the wire can be hammered in with a slightly roughened steel punch.
  I'll do most of the cutting while the bands are still flat, then bend to shape, finish the cutting( I'm worried that in the bent area, the grooves might distort in bending, so I'll wait till after, the set in the wire.


The two spurs set in pitch, with some chisels

 It's a time consuming process, but enjoyable, as it is so very direct. Pat

Followers

Contributors